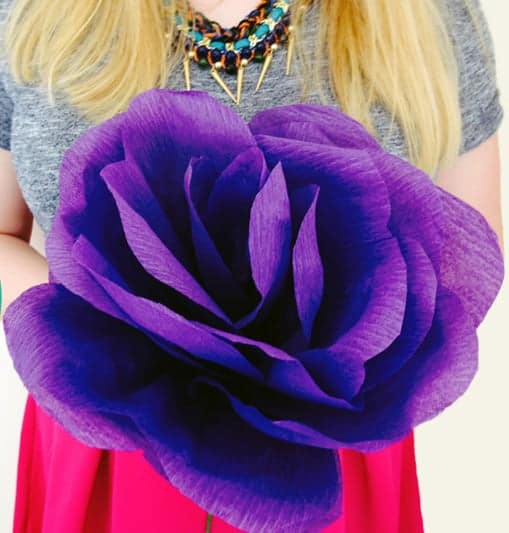
DIY: How to Make A Giant Paper Rose Bouquet
I am so excited to share today’s DIY with you! If you are a regular reader of Bespoke Bride you might have noticed that Jess is our queen of DIY, however for this week she has handed over the reigns to me and I couldn’t have been happier. Not just because it turned out exactly how I wanted but because sometimes it is fun to mix it up a little.
I love flowers! My house is always full of them but this year I noticed that my hay fever has arrived a little earlier than usual, so on occasion I have found myself moving my gorgeous vases of fresh cut flowers back outside until my antihistamines have taken effect. This got me thinking about how I would tackle my small problem of hayfever on my wedding day. I did a little search and came across these giant paper flowers and just had to give them a go. The result was a giant, fun, bright and quirky bouquet that would look absolutely darling for any bride or bridesmaids that might want to avoid having a runny eyes and nose for the big day.
You will need: 2 pieces of A4 paper// pencil// scissors// double sided crepe paper (this is important as single crepe paper will not have the same effect!)// Floral Wire// Floral tape//
Step 1: Draw your templates – this really depends on the size you would like you bouquet to be be. I wanted to mine to be extra large so I chose to use about half a portrait A4 piece of paper for petal 1 and the the full width of a portrait A4 piece of paper for petal 2. If you wanted them to be the half of the size then it would be best to half the size of the template.
Step 2: Cut out your templates.
Step 3: Take your sheet of crepe paper (I used 3 metres x 50cms and had tons left over and could of easily made another 2 roses from it) and using your template for petal 1 trace about 6-8 petals. Then with the template for petal 2 you will need to trace 16-18 petals.
TIP! When tracing make sure you trace the petals do that the crepe paper is running vertically to the flower this will make it easier for you to shape the petals as you will see in the next few steps.
Step 4: Cut out all your petals.
Step 5: One by one, take each of your petals and gently tug on either side of the crepe paper, you will see it start to stretch slightly which will give the petal more of a natural effect. It might help to tug on small sections of the petal if you are nervous that you might rip the petals.
Step 6: You should see the petals start to cup slightly.
Step 7: Now using a pencil gently roll the very tips of the petals around a pencil.
Step 8: You should see the petal start to gain a more natural petal shape.
Step 9: Set your petals aside for now and take you floral wire and floral tape.
Step 10: Tape your floral wire together to make it more sturdy.
Step 11: Now you can begin to form the flower, so take one of your smaller petals and wrap it tightly around the stem. Secure well with lots of floral tape and continue adding all the smaller petals. Make sure your are layering the petals evenly and rotate the stem each time you add a new petal so that you are not adding petals in the same place.
Step 12: You should now see the bud of the flower starting to take shape.
Step 13: Now you are ready to start adding your larger petals in the same way – ensure you are layering the petals evenly and rotate the stem each time you add a new petal.
Step 14: Continue until you have added all the petals – with the last petal you might just want to secure more tightly with some more floral tape, just in case your petals start to droop.
Step 15: Woila! You now have your very own giant paper rose. These are large enough to use as singles or add another 2 or 3 for a full bouquet. Aren’t they beautiful!!!
Not bad for my first lone DIY huh?
Much Bespoke Love
Emily x


Great tutorial! I love these for wedding and shower decor! The amusement park I grew up going to used to have giant paper flowers for sale, and my mom always refused to buy them for me “because I could make them” – but mine never looked like this! Going to try it again with grown up supplies (aka DOUBLE sided crepe) and your expertise!
Let us know how it goes, would be great to see your creations! If you are on Instagram tag us in – @bespokebride 🙂
xxx
What a fun idea! I love incorporating flowers without actually caring for flowers.