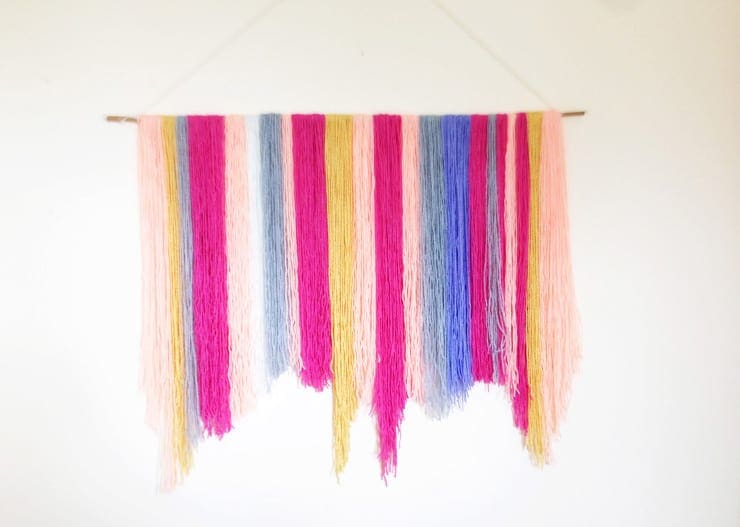
DIY: Yarn Hanging Backdrop
I have been looking for something to dress up a plain wall in my dining room for a little while now. I am a quite fussy when it comes to paintings and pictures and I wanted something quite large that would be bold and make a statement. So I did a little research and came across the idea of creating a piece of hanging wall art using wool or yarn.
I love how versatile these hanging banners are, they would be perfect as wedding decor or as a photobooth backdrop as well as looking just as good for as a piece of wall art for my home. Once I started making it I couldn’t help but think how awesome it would be to make one of these using stronger colours such as oranges, blues, reds, whites and blacks, complete with fringe this would make a great aztec design, don’t you think? I think that will be next on my list.
Anywho here is how I made it…
You will need: a piece of dowel or bamboo (I used about 3ft however you can use smaller or larger depending on your needs)// Wool in various colours// Glue// Scissors//
Step 1: Tie some sturdy string to each end of your dowel/ bamboo so that you can hang it whilst you work on adding the yarn.
Step 2: Make sure the string is tied tightly around 3 inches from each end.
Step 3: Take your wool and begin by cutting various lengths from each colour.
Step 4: The longest length I used was around 2ft and the shortest 16inches.
Step 5: You might find it easier to cut strands separately using a measuring tape or you can get inventive and wrap the string around things to get continuous strands, I wrapped from hand to elbow, even foot to thigh to get even strands.
Step 6: So that I could keep track of what colours I was using and where I added my strands to my dowel as I went along, this meant I could arrange the wool by colour and length until I got the design I wanted.
Step 7: Now you are ready to start gluing your wool to the dowel/ bamboo.
Step 8: Once all your strands are glued down you are ready to trim. I wanted quite a geometric edge however you can opt for all once length, a downward slant from one end to the other… the choice is yours!
Step 9: Stand back and check to make sure you have trimmed all the edges and their are no leftover threads.
Step 10: All thats left now is to hang your backdrop in its desired location and woila! You have a versatile piece of wall art, a backdrop and a banner all in one!
Pretty easy huh! No excuse for bare walls any more! If you decide to give this a go, we would love to see your designs so please tag us on Instagram and use #bespokebride. Thats all for now folks!
Much Bespoke Love
Emily x


Love this DIY Em! Being in a rented flat it’s really hard to inject colour and personality into it. Ive been wantinf something to put in our bedroom for a while now and think this could work perfectly.
Xxx
Aw Soph you have to make one! Everyone that comes round the house at the moment is asking me to make them, I’m sensing a new venture coming on 😀
xxx
Wow! I’ve been looking for ideas since I finally decided to listen to my Bohemian Soul and redecorate my living room… this is perfect! Thank you so much! Love and Light xxxx