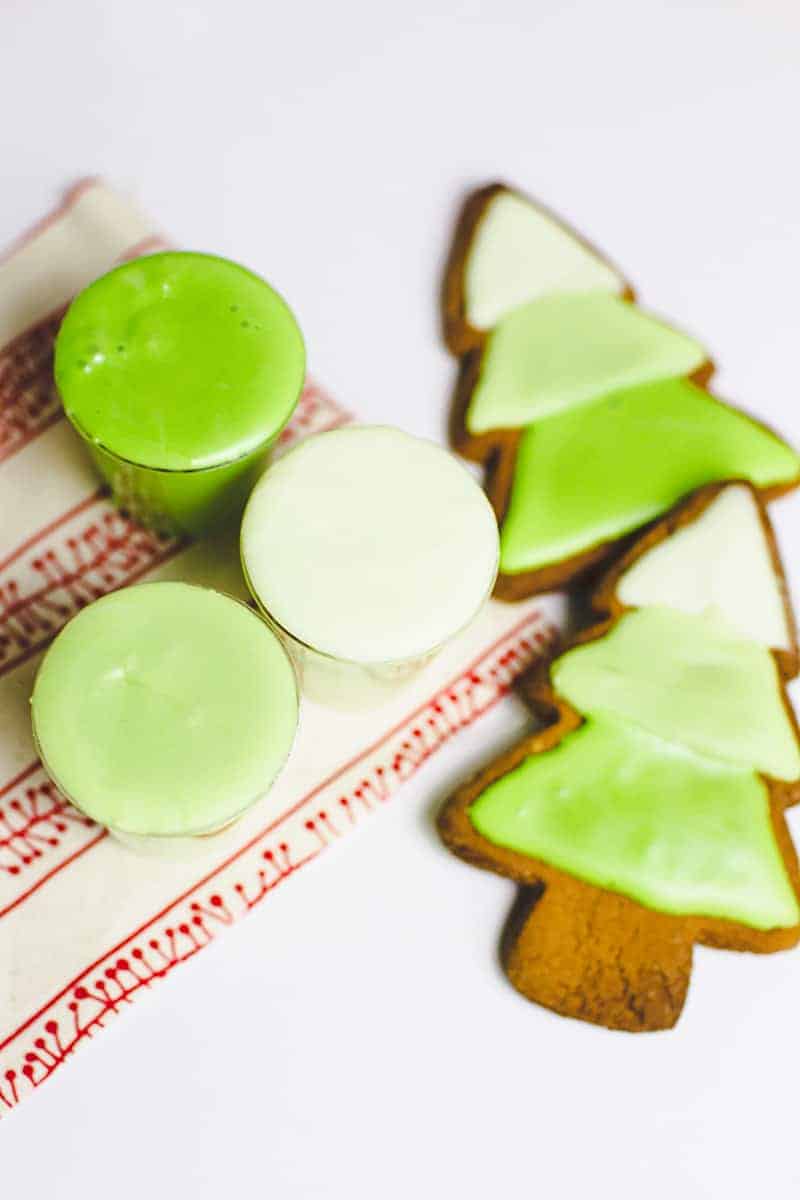
DIY Ombre Christmas Tree Cookies
Hands up if you like getting festive with your baking around this time of year?! I don’t normally, but last year I found myself alone on Christmas Eve (cue the violins!!), everyone around me had made plans and I hadn’t so I decided to spend the day doing a spot of baking and I absolutely loved it!! This year, I won’t be alone on Christmas eve but I will however still be getting my bake on! And if you, like me are looking for a cute spin on a classic cookie then look no further because these ombre iced Christmas tree cookies are for you! To make 25 cookies you’ll need:
100g soft brown sugar // 100g golden syrup // 225g plain flour //1/4 tsp salt // 2 tsp bicarbonate of soda // 1 heaped tsp ground ginger // 1/2 tsp cinnamon // 50g unsalted butter // 250g icing sugar // 2 tbsp water // baking trays // Christmas tree cookie cutter // Green food colouring //
STEP 1: Pre heat your oven to gas mark 5 or 180C and grease 2 baking trays.
STEP 2: Sift together the flour, salt, bicarbonate of soda, ground ginger & cinnamon.
STEP 3: Heat the butter, sugar and syrup until dissolved then leave to cool. Once the mixture has cooled mix with the dry ingredients to make a dough.
STEP 4: Chill the dough in the fridge for around 30 minutes.
STEP 5: Roll out the dough to around 1/4 inch thick and cut your christmas tree shapes then place on the trays allowing space for them to spread.
STEP 6: Place in the oven for 10 – 15 minutes then allow to cool completely.
STEP 7: Mix together your icing sugar and water until the mixture is thick. Add more icing sugar or water where needed to get the correct consistency! You’ll want the mixture to be able to coat the back of your spoon.
STEP 8: You now have two options, you can either add a little bit of food colouring (half a teaspoon) to the mix, ice the top part of your cookies then add a little bit more food colouring to the mix and ice the next part of your cookies, OR you can now dish your icing sugar into three separate bowls and mix each of them to the colours that you like.
STEP 9: Start by icing the top of all of your trees, leave to set for around 5 minutes then move on the next colour. Do this until your tree is covered and you’ve left a little biscuit showing for the stump!
And that’s it! You’re done! All that’s left to do now is share them around with everyone to eat! Or you know, not! xx
Tips For Preparing Your Christmas Tree Cookies
Christmas tree cookies are a delightful way to add festive charm to your holiday baking. Whether you’re a seasoned baker or just starting out, crafting these treats can be a fun and creative activity for the season. Here are some practical tips to help you bake and decorate stunning cookies that will impress your friends and family.
1. Start with the Perfect Dough
For flawless Christmas tree cookies, opt for a sturdy sugar cookie dough. It holds its shape well during baking, ensuring your cookies look like trees and not unrecognisable blobs. Chill the dough for at least an hour before rolling it out. This step helps prevent the cookies from spreading too much in the oven.
Pro Tip: Add a touch of almond or vanilla extract to give your cookies a warm, festive flavour.
2. Choose the Right Tools
Invest in high-quality Christmas tree-shaped cookie cutters for consistent results. Use a rolling pin with adjustable guides to achieve an even dough thickness, ideally around ¼ inch, which ensures the cookies bake evenly.
Our Experience: I’ve found that metal cutters provide cleaner edges than plastic ones, making your Christmas tree cookies look sharper and more professional.
3. Master the Art of Decorating
The magic of Christmas tree cookies lies in the decoration. Use royal icing for smooth coverage and detail work, as it hardens beautifully. Add edible glitter, sprinkles, or tiny candy ornaments for a festive touch.
Decorating Tip: Work in layers. Start with a base colour, let it dry, then add details like garlands or “ornaments” using contrasting icing. Piping bags with fine tips will help you achieve precise designs.
4. Don’t Forget the Baking Basics
Bake the cookies on parchment paper or silicone baking mats to prevent sticking and ensure even browning. Rotate your baking sheet halfway through the baking time to account for uneven oven heat.
Pro Tip: Keep a close eye on the cookies during the last few minutes of baking. Light golden edges are your cue—they’ll continue firming up as they cool.
5. Get Creative with Flavours and Colours
Who says Christmas tree cookies have to be plain vanilla? Experiment with peppermint extract or cocoa powder for a unique twist. Use green food colouring for a classic tree look, or go wild with rainbow colours for a modern take.
With these tips, your Christmas tree cookies will not only taste incredible but also serve as edible works of art that add sparkle to your holiday celebrations. Happy baking!
For more inspiration, visit Sally’s Baking Addiction or The Spruce Eats.


So easy to prepare. Crunchy and fresh