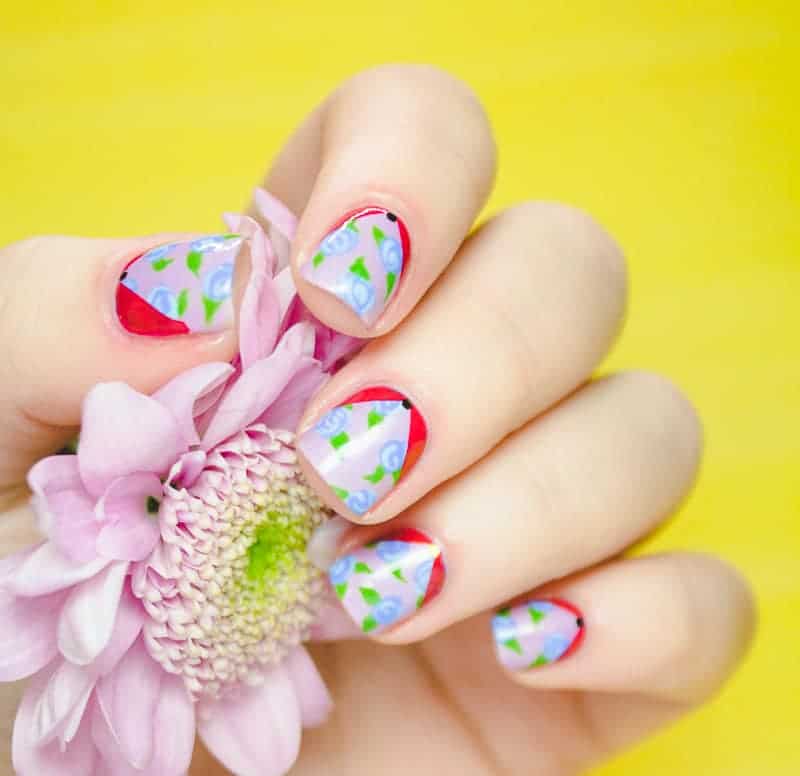
DIY FLOWER NAIL ART TO FLAUNT THIS SPRING
Most of you lovely lot will remember last year me and Em attended the Cosmo Blog Awards and it was seriously epic! The room was filled with bloggers, cocktails and fun stalls to try out but one of the highlights for me was seeing a familiar face there, not from any previous industry events but from school! The beautiful Sammy from The Nailasaurus had been nominated for best beauty blog and it was a mere 6/7 years ago that we were both at sixth form together! It really is a small world and I was so pleased that her awesome blog is getting so much recognition! I just know that you guys are going to love her nail tutorials as much as we do and so we felt it only right to ask Sammy to dream up a design for us to share with you! Low and behold these DIY flower nails to flaunt this spring…
YOU WILL NEED:
A selection of nail polish colours // A quick-drying top coat // A nail art brush // A pencil // Chevron stencils or scotch tape // Glitter (optional)
STEP1:
Paint on your base colour and wait until it’s dry to the touch.
STEP 2:
Using the rounded end of a pencil (or a paintbrush, or anything else similar that you have laying around) to create some circles on your nails. Take a blob of nail polish out onto a sheet of plastic and dip the end of the pencil into it, then dot it in one downwards movement on to your nail to create a perfect circle.
STEP 3:
Using a skinny nail art brush, start to create a petal pattern from the centre outwards. You can think of it as drawing lots of little semi-circles around the centre of each flower.
STEP 4:
Add a few leaves at random around the flowers using a green nail polish
STEP 5:
Add a layer of quick drying top coat to seal it all in and wait at least 10 minutes or until it’s completely dry through to the bottom layer. Glisten & Glow’s HK Girl is an amazing quick dry top coat.
STEP 6:
I’m using chevron stencils from Nail Mail but if you don’t have any to hand, it’s easy to DIY your own stencils by cutting scotch tape in to a ‘V’ shape will work perfectly. Before you use it on your nail, stick it to the back of your hand a carefully peel away to remove some of the adhesive. This will make it easier to remove from your nail without pulling up half your manicure with it! Place the point of the ‘V’ in the centre of your cuticle and paint over the nail showing through, right up and over the tape. To make sure you get the smoothest line possible, remove the tape while the polish is still wet.
STEP 7:
I’ve placed a piece of glitter where the colour blocking meets but this is an optional step depending on how sparkly you feel! To get an accurate placement, I use a toothpick to place the tiny sequin. Just lick the end to make it tacky and you should have no problem picking up the glitter. Alternatively, if you have a nail polish with chunky glitter in, you can scoop a piece straight out of there – sticky included!
STEP 8:
To finish off, you can add a piece glitter or other decoration at the base of your nail and make sure to top it all with your favourite top coat. If you have any mess around the edge, use a stubby brush dipped in acetone or nail polish remover to swipe it away and leave you with a perfect edge!
How cute are they?! If you’re looking for even more nail designs make sure you follow Sammy on Instagram and Twitter too! You will not be disappointed, her feeds are full to the brim with AMAZING nail inspiration! (Seriously though guys, I could scroll for hours!) xx


