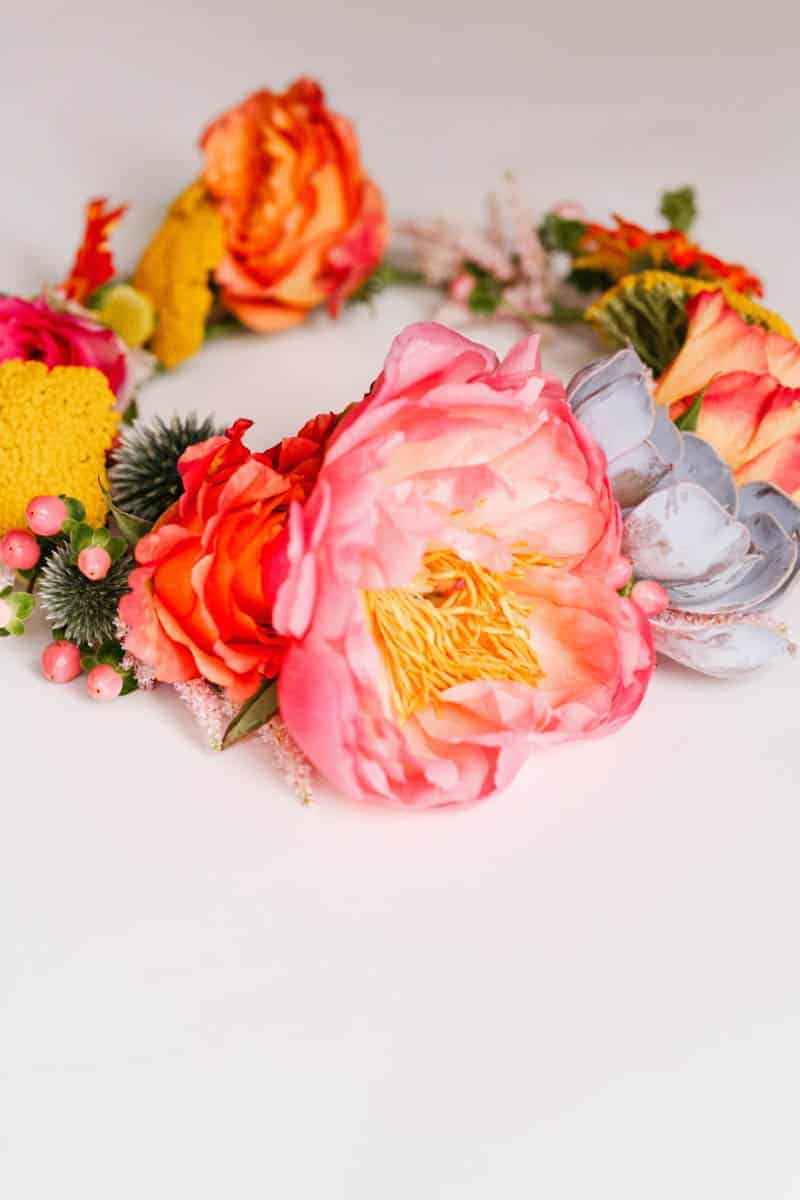
HOW TO MAKE A SWEET & SUCCULENT FLOWER CROWN
If I had to pick just one fashion item to take with me to a festival, it would be a flower crown for sure! I dont even think I would call it a trend anymore, more like a summer staple! I’m convinced flower crowns are here to stay! If you can’t already tell, I am obsessed, if I could wear fresh flowers crowns everyday then I sure would, but being eco conscious I would prefer to save such luxuries for special occasions, a wedding being the perfect opportunity!
I have to admit this has to be one of my all time favourite crowns, Interflora always nail our concepts (they designed this vibrant crown for us last year!). This time we tasked them with the challenge of a succulent crown and true to form they delivered the most gorgeous piece of what can only be called art! Its full of bright oranges, pinks & yellows, very Bespoke Bride if I might add! You are going to love it!!!
You Will Need
2 x Orange Gerberas// 2 Craspedia Heads// 1 x Bunch of Pink Hypericum Berries// 1 x Piano Rose// 1 x Pink Peony// 3 x Orange Roses// 1 x Bunch of Eryngium Thistle// 4 x Pale Pink Astilbe// 3 x Bunches of Achillea// 1 x Grey Echeveria// Florist Wire// Florist Tape// Scissors//
Step 1
To make the base of the crown, tape two pre cut lengths of florist wire together with florist tape. Cover the wire by wrapping a length of florist tape around it.
Top Tip! To get the perfect fit, measure around your head with with a length of yarn and cut your florist wire to size.
Step 2
Bend the wire into a circle and twist the ends together to secure. For extra strength, wrap a small pieces of florists tape around the join.
Step 3
Mount the echeveria onto the wire by inserting 3 lengths of florist wire through the base of the succulent. Using a pair of sharp scissors, cut the wire to approximately 6 inches in length.
Step 4
Wrap a length of florist tape around the base of the echeveria and the wire to create a cleaner finish.
Step 5
Using a pair of sharp scissors, cut the stems of the other flowers to approximately 2 inches long. To mount the flowers onto florist wire, fold a length of wire in half and hold them against the flowers’ stem. Wrap one end of the wire around the stem to secure.
Step 6
Wrap a length of florist tape around the stem and wire to create a cleaner finish. Repeat until all the flower heads are mounted on florist wire.
Step 7
Begin to attach the flowers to the crown by wrapping a long length of florist tape around each stem and the crown.
Top Tip! Start the crown with a bunch of astilbe to create a textured base for the bolder flowers.
Step 8
Continue to arrange and attach the wired flowers to the crown, making sure to alternate the colours and different sizes of flowers as your work along the length.
Top Tip! Consider the texture of the flowers as your work around the crown. The florist has mixed fern-like astilbe with a vibrant gerbera, soft orange rose and textured achillea to start this crown.
Step 9
Trim any excess wires or stems as your work around the crown to keep it neat and comfortable to wear.
Step 10
Continue building up layers of flowers and foliage around the crown, until the headpiece is filled with beautiful vibrant flowers.
Top Tip! Add foliage such as french ruscus, ivy leaves and asparagus fern between the flowers to create a balanced, natural look.
Super Suppliers – Concept: Bespoke Bride// Flowers: Katie Ward for Interflora// Photography: Cinzia Bruschini// Hair & Makeup: Elizabeth Clare// Venue: Withamside House//
xxx


Great inspiration:) (for those with a bit of skills lol)
WOW! This idea is amazing! Can’t wait to try it.