5 PAINT DIYS TO TURN GLASS BOTTLES INTO BEAUTIFUL TABLE DECOR!
When it comes to wedding decor, sometimes you just need to get a little thrifty and start reusing items to cut down the costs. One of the most effective ways to do this is to save any bottles you have finished with, (or you know…just buy extra wine…) and wash them out then remove all of their labels. When you have a good collection of bottles painting them and filling them with pretty blooms is an awesome way to decorate the tables at your wedding! Here’s 5 different tutorials to show you what you can do with a little paint and some sharpies!
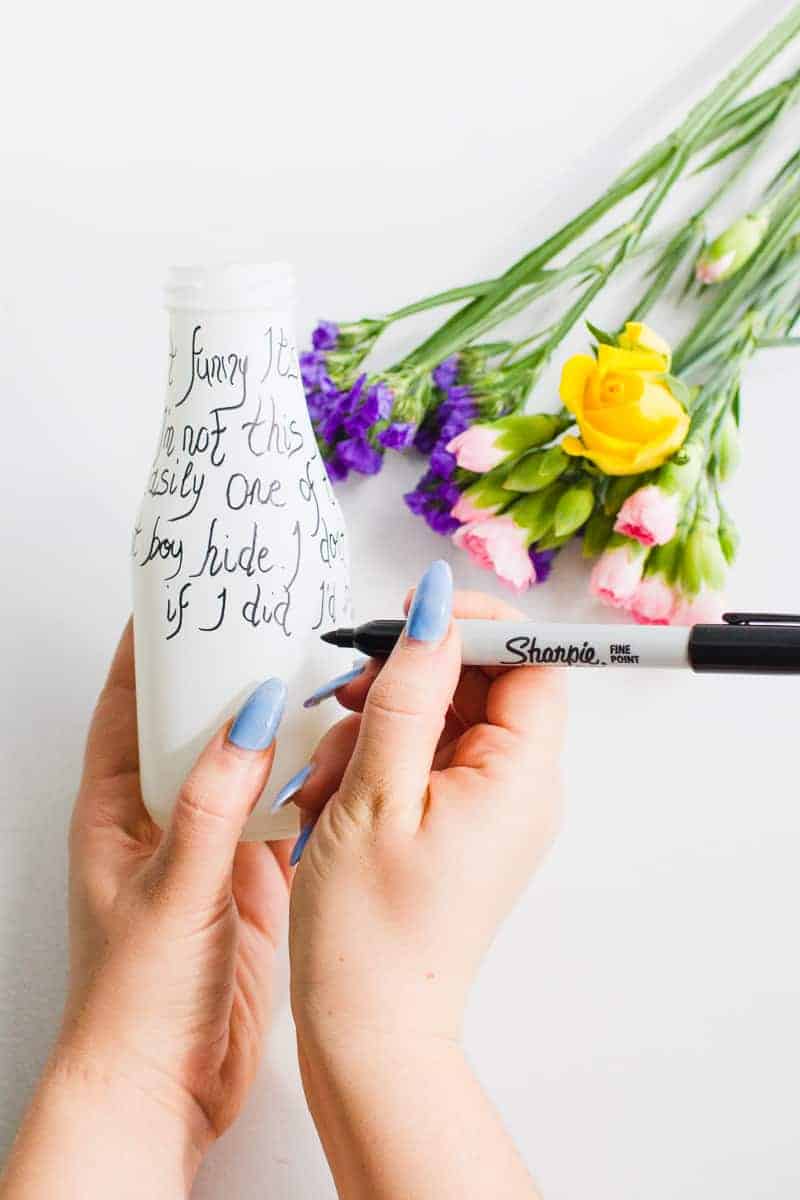
1. ADD A QUOTE OR YOUR FAVOURITE SONG LYRICS
I absolutely adore the idea of writing the lyrics from a song, perhaps your first dance or just songs that remind you of each other around the bottles, they add an extra splash of personality to the tables.
YOU WILL NEED: White Spray Paint // A Black Sharpie //
TIME PER BOTTLE: 5 minutes (not including paint drying time)
STEP 1. Spray paint your bottle white, allow to dry, then add a second coat.
STEP 2. Write the lyrics of your favourite song around the bottle, if you don’t like your own hand writing why not call on the bridesmaids or even type it into word in a font you do like and then copy that!
2. COLOUR BLOCK IT
If you want to make a bright statement with your bottles then why not colour block them with paint? It looks really effective and adds a super POP of colour!
YOU WILL NEED: Paint in 3 different colours (I used a chalk style paint) // Masking Tape // Paint brush //
TIME PER BOTTLE: 10 minutes (not including paint drying time)
STEP 1. Mask off the bottom 1/3 of your bottle and make the line as straight as you possibly can! Then add your first coat of paint. Allow to dry and add a second coat if you think it needs it.
STEP 2. Take off your masking tape and add a new piece another 1/3 of the bottle up, you’ll also want to add a piece of masking tape to the top of bottom layer of paint to ensure the line remains straight. Then get happy with your next shade of paint!
STEP 3. Finally repeat with your last 1/3 of paint and your last shade of colour and allow to dry!
3. CREATE A GOLD HENNA DESIGN
I love that with festival season just around the corner my Pinterest feed is filling up with beautiful henna designs and I thought it would be cute to add a henna style design to a bottle! This was quite an intricate and time consuming project for 1 bottle so if you’re going to do this I would recommend it a few large bottles instead of lots of small ones.
YOU WILL NEED: White Spray Paint // A gold/bronze Sharpie //
TIME PER BOTTLE: 15 minutes (not including paint drying time)
STEP 1. Spray paint your bottle white, allow to dry, then add a second coat.
STEP 2. Find a henna design you like online and start to copy the design free handed onto your bottle.
STEP 3. Continue section by section until you’ve covered your bottle!
4. MAKE IT METALLIC
We all know that metallic is having a major moment right now, and rightly so! It’s bloody beautiful! If you wanted to you could just spray paint your whole bottle a shade of gold or bronze and it would still look amaze, but I wanted to jazz it up a bit!
YOU WILL NEED: Gold Spray Paint (I used this one) // Masking Tape //
TIME PER BOTTLE: < 5 minutes (not including paint drying time)
STEP 1. Using masking tape, mark off 3 or 4 loops around your bottle that you would like to remain see through. I cut my masking tape in half length ways to create the thinner sections, but if you can find 2 different sizes of masking tape then you’re onto a winner!
STEP 2. Spray paint gold, allow to dry then add a second coat and allow to dry.
STEP 3. Pull off your masking tape.
5. POLKA DOT IT
Add an element of fun to your decor by popping some polka dots on to your bottles! Not only does it look really cheery but these also look great teamed up with the colour block bottles!
YOU WILL NEED: White Spray Paint // 3 different colour paints // Paint brush //
TIME PER BOTTLE: 10 minutes (not including paint drying time)
STEP 1. Spray paint your bottle white, allow to dry, then add a second coat.
STEP 2. Start to paint your circles onto the bottle, varying the colours as you go. If you find it easier you could always use a circular stamp or sponge to dab the paint straight on!
STEP 3. Continue until the bottle is covered in bright and bold spots!

So there you have it, 5 fun ways to decorate bottles to use as table decor! Our puppy Mushu definitely approved!! Do you think you’ll be trying any of these out? Don’t forget you can also check out our other decor DIYs here! xx


We love these vases! So many interesting designs can be made with the detailed painting! Lovely!