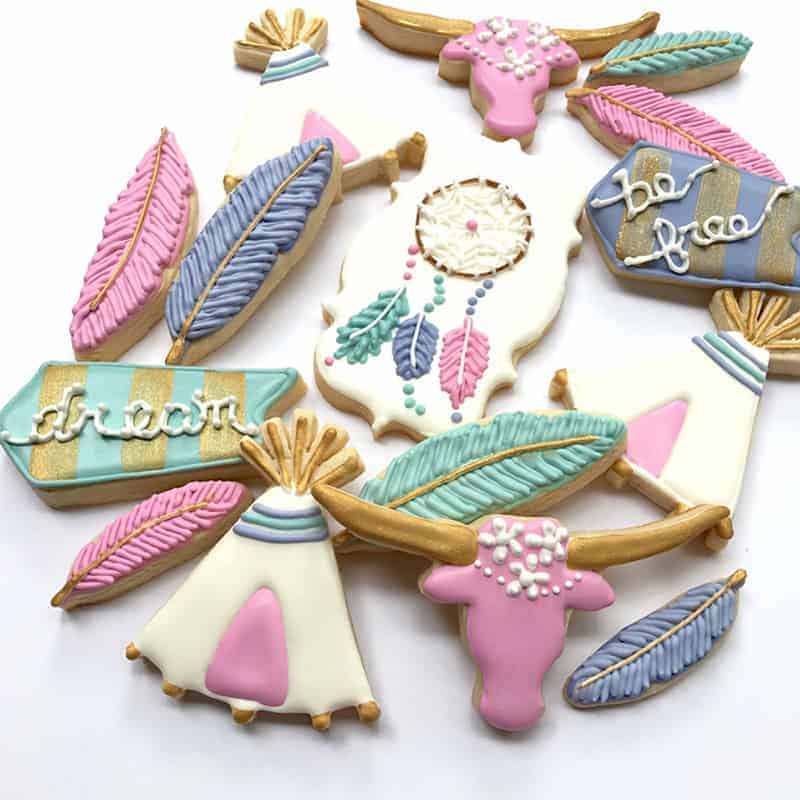
MAKE THESE CUTE BOHO COOKIES!
Festival season may be over but I’m still clinging onto summer & with the weather being so hot this week it certainly doesn’t feel like summer is over! If you love the bohemian style as much as we do then you’ll love today’s DIY! We’re welcoming back Obsessive Cookie Designer to the blog (you can check out her awesome instagram here!) I think these cookies would be awesome for a boho bridal shower or hen party! They would also make cute favours! Here’s how to make your own…
YOU WILL NEED:
Boho Cookie Cutters (these were from Cookie Cutter Kingdom) We chose a tipi, feathers, a bull’s head, an arrow and a scroll for the dream catcher // ½ cup butter // 1 cup white sugar // 1 egg, well beaten // 1 tablespoon milk // ½ teaspoon vanilla extract // 1 ½ cups flour // ¼ teaspoon salt // 1 teaspoon baking powder //
For the icing…
1 box of powdered sugar (1 pound) // 2 egg whites // 1/2 cup of water // Food colouring //
For the color scheme, we used cool blues and purples, coupled with a vibrant pink, however depending on your wedding or event colors, the color options are endless! Click here to see how to bake the cookies, then follow the decorating instructions below to learn how to complete each cookie!
TO DECORATE THE TIPI…
STEP 1: Start by piping the white icing on, leaving a small triangle in the middle for the door.
STEP 2: Pipe in the pink icing next onto the door.
STEP 3: Add your purple and green lines to the top of the tipi
STEP 4: Finally, paint your gold touches onto the top and the bottom!
TO DECORATE THE BULL…
STEP 1: Start by adding white to the horns of the bull.
STEP 2: Next, fill in the pink icing onto the head.
STEP 3: Add your gold onto the horns
STEP 4: Finally, paint on the white flowers and dots using white icing.
TO DECORATE THE FEATHERS…
STEP 1: Start by icing your main colours onto the feathers, we varied this with purple, pink and a teal colour.
STEP 2: Next, carefully pipe lines up each side of the feather.
STEP 3: Repeat step one filling in the gaps between your original lines.
STEP 4: Finally, add your gold strip up the middle
TO DECORATE THE DREAM CATCHERS…
STEP 1: Start by icing the entire cookie white.
STEP 2: Next, using a round shape, (like a lid) create a circle by icing around the outside of it.
STEP 3: Add lines starting from the centre of the circle all the way to the edge of it.
STEP 4: Then, add in semi circles all around the inside edge of the circle. Repeat this step moving in each time until you hit the middle.
STEP 5: Pipe mini flowers at the bottom of your cookie, varying your colours each time.
STEP 6: Finally, add some small dots at the bottom and the top of the feathers.
They look too good to eat right?! You can also check out OCD Cookie Designers pumpkin cookies that we featured here and her amazing christmas tree light cookies here! Just in time for the upcoming holidays! xxx


