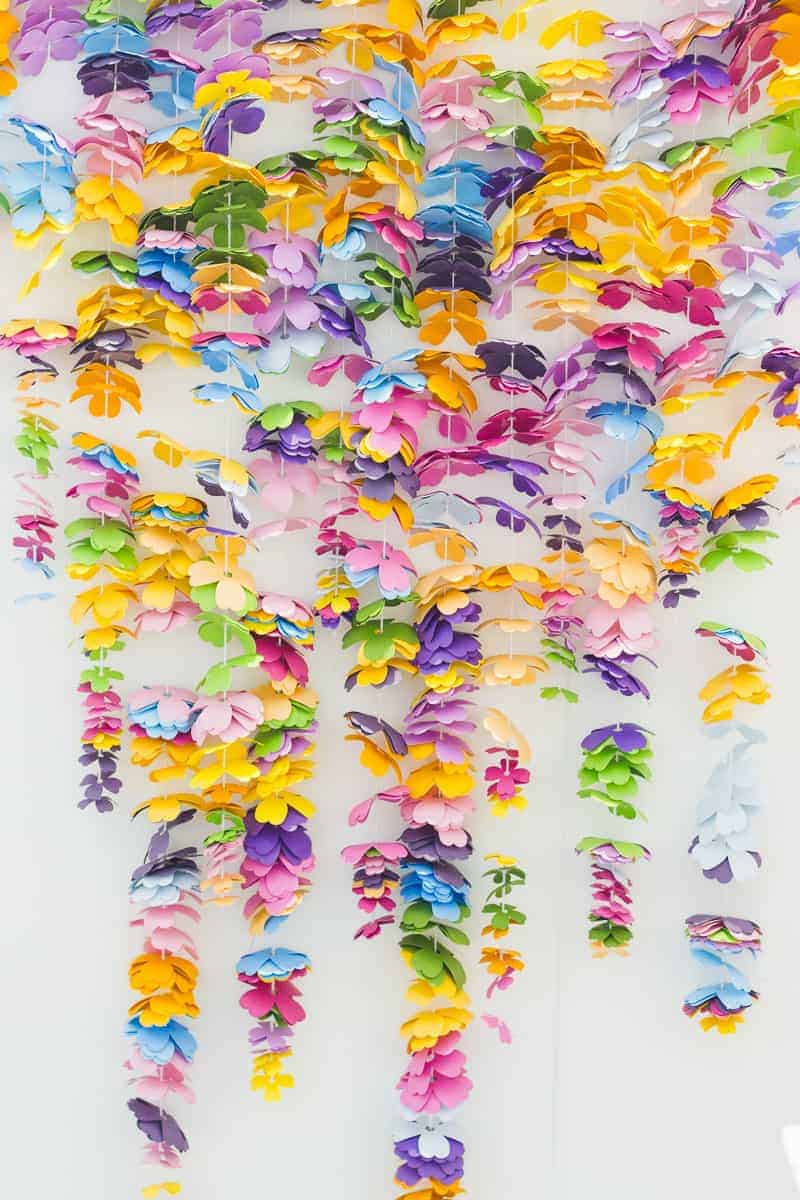
DIY CASCADING FLOWER BACKDROP
If you came to the Handmade Fair last weekend then you would have seen our bright and bold cascading flower backdrop that we created especially for the show! We absolutely loved how it turned out and wanted to share how we made it with you because quite frankly…how freaking awesome would this backdrop be at a wedding?! Whether you use it behind the top table, your altar or for a photobooth backdrop it’ll be a sure pop of colour and look fab in your photos!
Also, special thanks to Lexy from Tilly and the Buttons who very kindly modeled in front of the backdrop for us at the end of the weekend! What a babe!
YOU WILL NEED:
Card in a variation of colours (we had 14 different shades and colours in total and used around 450 pieces of card sized 12inches by 12 inches) // White yarn // A threading needle // A Cricut Machine // A pen //
Please note* Whenever we feature tutorials using the Cricut machine we always say that if you want to, you can cut items out by hand but I really really really wouldn’t recommend that for this tutorial because you will need around 4000 flowers in total!
STEP 1:
Choose a simple flower design from the Cricut design space and size it to just under 4 inches wide, we then set the flowers to fill the mat meaning we fitted 9 flowers per sheet of card.
STEP 2:
Get the machine cutting! This is a tedious step because you are consistently loading card into the machine, then pulling your flowers off the mat and loading more card. I promise though it would be a lot more painful if you were cutting by hand!

STEP 3:
Next we decided to create some smaller flowers to go on the bottom of the strings, just to make it look more realistic. We cut out around 500 of these sized 2 inches wide.
STEP 4:
Once you’ve got a room full of flowers and they’re all cut out, use a pen to fold the edges of the flowers over to create a more 3D shape.
STEP 5:
Grab your yarn, thread it through your needle and start to thread your flowers on. We decided to create 4 variations of length of ‘flower strings’ which were as follows:
35 inches of yarn (40 flowers threaded on)
48 inches of yarn (65 flowers threaded on)
65 inches of yarn (90 flowers threaded on)
74 inches of yarn (150 flowers threaded on)
Be sure to include around 10 small flowers on the end of each string! We made 46 strings in total to cover a 3.5 meter wall, but obviously vary this to suit your space!
STEP 6:
Finally, once all of our flowers have been threaded onto the yarn it was time to assemble the backdrop! We knew that our flowers were going to be hanging in front of a wall so we simply staple gunned the top of the yarn straight into the wall, there will however be a lot of venue that won’t want this to happen so you could either tie the flower lengths to a backdrop stand or as if there is anyway that you can tie the lengths to beams. The aim is to work with what you have!


So there you have it! A fun, bright and bold backdrop that will be sure to wow! You can check out the rest of our wedding décor DIYs here! xx
P.S You may notice in the photos that we cut out flowers with holes through the middle, this was not a good idea, because the yarn was obviously too thin to hold the flowers up so we had to tape over each individual flower hole first, then thread the yarn through. Trust me when I say it will be much easier to just push the needle and yarn straight through the card!


