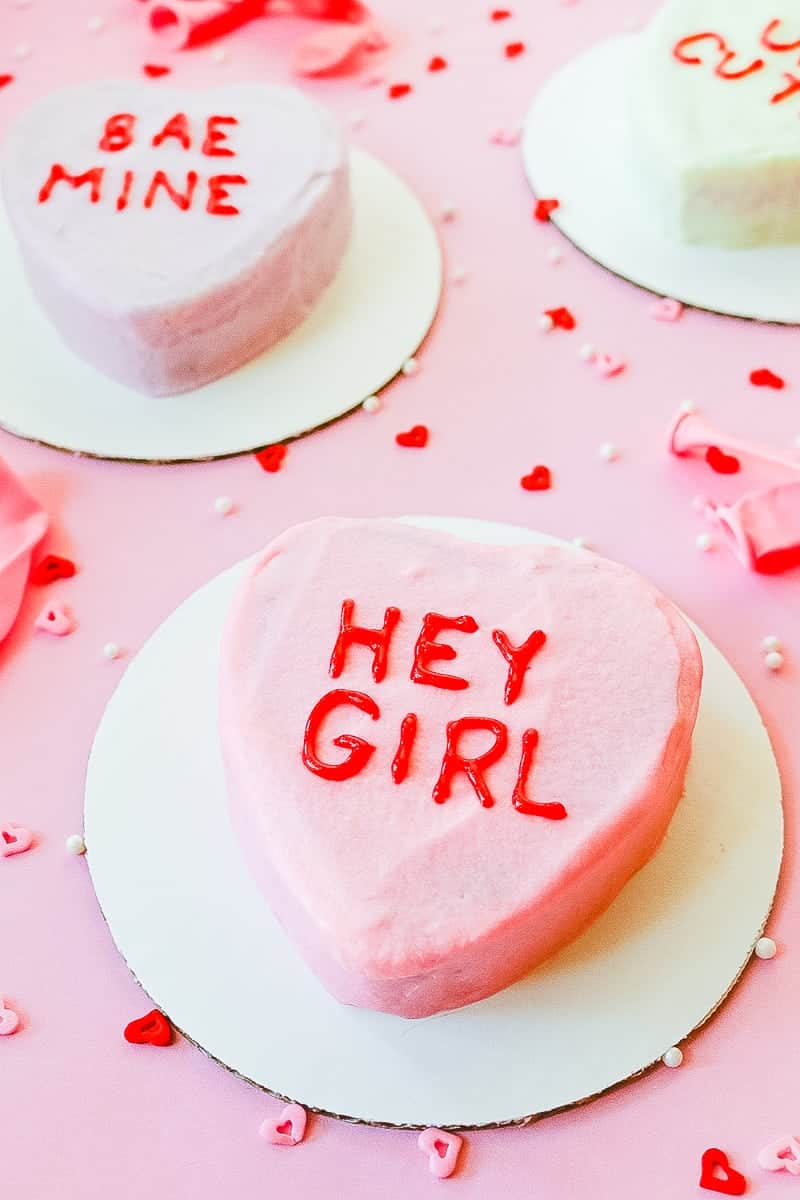
HEY GIRL! MAKE THESE CUTE CONVERSATION HEART CAKES FOR V-DAY!
Happy Friday guys! I’m so excited to introduce you to one of our guest DIYers and a super cute conversation heart cake tutorial today! Since me and Emily aren’t the best at baking we felt it would be better if we handed you over to Holly from Club Crafted for this adorable tutorial just in time for Valentines Day….
Hi there! I, Holly, am really only into Valentine’s Day for the treats. Sorry boys, but dessert is still the way to my heart, and whether you celebrate Valentine’s Day with your girl gang or with your S.O., these fun conversation heart cakes are the perfect way to celebrate the day of love.
Based on the classic conversation heart candies, these mini cakes can be customized with your favorite little sayings. Display them for a party, make them for your friends or make them for simply indulging on Valentine’s Day! Using any recipe you’d like with mini heart pans, spread pastel colored icing all over the cake and write words on them with red gel icing to create cakes that look just like the conversation hearts we all know and love. Here’s how to make them!
YOU WILL NEED:
Your favourite cake recipe* // Your favourite white frosting recipe // 4-inch heart springform pans // Cake level or knife // 6-inch cake boards // Gel food colouring // Angled spatula // Red gel icing //
*Note, a recipe for 24 cupcakes will make approximately 6 mini heart cakes.
STEP 1:
First, choose your flavor! I thought it was appropriate to make red velvet cake with a smooth cream cheese frosting for these themed cakes. You can use any combination as look as the frosting is light enough to be dyed a pastel color. Then, preheat your oven to the necessary setting, usually 350 degrees.
STEP 2:
Spray the heart springform pans with cooking spray and set aside. Prepare the cake batter according to the recipe instructions and divide the batter between the pans so that each is about ½ full. You may need to bake in batches depending upon how many cake pans you have.
STEP 3:
Place the pans on top of a standard baking sheet. This makes them easier to move into and out of the oven. Baking times will vary according to the recipe. Bake for approximately the time of a batch of cupcakes and check often, increasing time as needed until an inserted toothpick comes out clean.
STEP 4:
Allow to cool completely before removing from the pans. Use a cake level or knife to level the domed top of the cakes.
STEP 5:
Prepare the frosting. It should not be too thick in order to spread easily. Separate the frosting into multiple bowls and add a couple drops of desired food coloring to each bowl. Mix to combine until each bowl reaches an even pastel color.
STEP 6:
Spread a small amount of frosting into the middle of each cake board and place the cakes top down onto the frosting to secure them to the boards. Use an angled spatula to apply a crumb layer by applying a thin layer frosting all over the cakes. Refrigerate for at least 30 minutes.
STEP 7:
Remove the cakes from the fridge and ice a second layer on the cakes, scraping the icing until smooth on all sides. Repeat with additional layers as needed and store in the fridge for at least 30 minutes.
STEP 8:
Lastly, use a red gel icing to carefully spell out words on top of each cake in capital letters. My personal favorites were BAE MINE, HEY GIRL and UR CUTE. To make the letters as even as possible, work slowly and start with the middle letters of the words (this ensures the words align in the middle of the cake).
Now the cakes are ready to show off and eat! Admire your work and then dig in! Sharing isn’t necessary with these mini cakes! xxx


