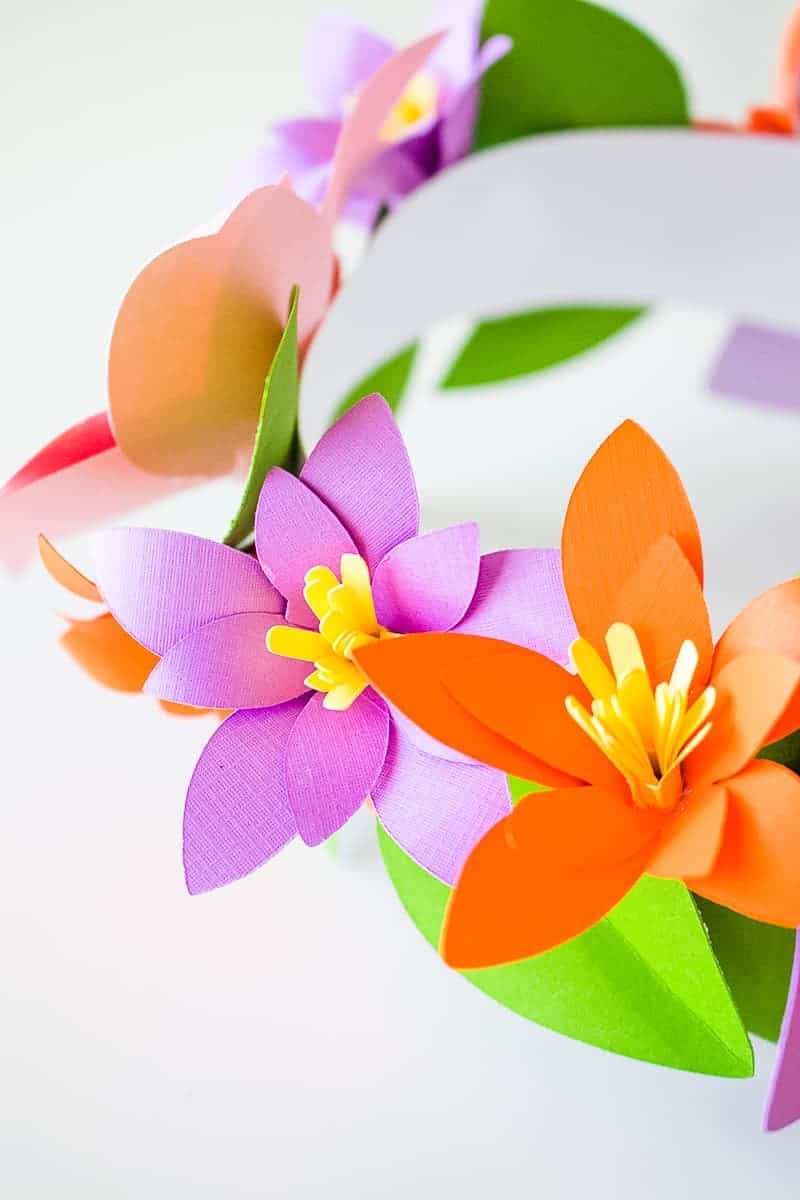
HOW TO MAKE A FUN PAPER FLOWER CROWN

Flower crowns are one of my favourite accessories not only when it comes to weddings but also festivals (and every day life!) whether they’re real flowers, faux flowers or paper flowers I’m seriously obsessed, and all the better when the colours are as bright and bold as this DIY flower crown we’re sharing with you today! Together with Holly from Club Crafted, and a bit of tips from the experts at Worldwide Florist, we’re going to demonstrate how fun making a crown like this is. They would look adorable on little flower girls or even a great craft at a bridal shower! Over to Holly…
When I set out to make paper flower crowns, I struggled with how to make beautiful origami flowers that were both simple to make and that would not appear cheesy or childish. After trying out a few different flower designs, I have two styles of flowers to share (with a template!) to make this project as easy as possible for you but still feel elegant, and once put together, these flower crowns are perfect for a bridal shower project or any other type of event you want to celebrate.
I’ll warn you, making these crowns is fun but will be a long process. Just use a variety of your favorite spring-colored paper and start cutting! Once all of the pieces are cut and curled, the gluing is a piece of cake. If you have a cutting machine, such as a Cricut or Silhouette, you can upload these PNG templates to cut for you. Otherwise, note that cutting by hand may take some time to cut enough flowers to fill the crown. There are two types of flowers: large individual petal flowers and smaller one-piece flowers.
YOU WILL NEED:
Coloured cardstock, including green for leaves // White cardstock // Scissors // Glue gun and glue sticks // Paper flower templates //
STEP 1:
If cutting by hand, print the paper flower templates in your desired size and use them as templates to cut out flowers from the colored cardstock. The one-piece flowers should be about 4 inches wide. The individual petal flowers should be about 2 inches wide for the large petals and 1.5 inch wide for the small petals (5 large, 5 small per flower).
Note, cut some petal shapes out of green paper for leaves and cut the comb-looking pieces out of a yellow or similar color to be the middles of the flowers.
STEP 2:
Cut two 11-inch by 1.5-inch strips of white cardstock. Glue them together to make one long piece, then wrap them into a ring and glue the ends together. This will be the crown base, so check that this will fit on your head and add additional paper if needed.
STEP 3:
Start making flowers! For the large petal flowers, separate 5 large petals and 5 small petals as well as one comb-shaped middle piece. Use the scissors to lightly curl the ends of all petals out. Then use your fingers to pinch the other end together to create a dip. With your glue gun, begin gluing the petals in a circle, overlapping on the dips slightly so that the middle is entirely closed, with the curls of all petals facing outward.

STEP 4:
Repeat the above gluing steps with the smaller petals and then glue it directly in the middle of the larger petals, placing it so that the petals are slightly offset from the other layer.
STEP 5:
Roll up the comb piece and glue the end to secure it. Fan out the pieces with your fingers. Glue this in the middle of the smaller petals. You should now have one large flower! Repeat to make at least 3 other flowers of this style in your desired colors.

STEP 6:
To make the one-piece flowers, take one larger piece, one smaller piece and a comb-shaped middle piece. Use the scissors to curl the petals all in one direction on both of the one-piece flower pieces.
STEP 7:
Wrap the large piece around and glue the ends together with the petals fanning outward. Repeat with the smaller piece and then glue inside of the larger one, placing it so that the petals are slightly offset from the other layer. Lastly, repeat the process of rolling the comb piece and glue it in the middle of the flower.
You should now have one small flower! Repeat to make about 8-10 other flowers of this style in your desired colors.
STEP 8:
You should have cut some various sized petal-shaped leaves out of green paper. Use the scissors to curl them outward just like the flower petals.
STEP 9:
Once you’ve made a bunch of flowers, it’s time to put together the crown! Start by gluing the large flowers about equal spaces apart around the crown base. I recommend starting with four and gluing them all on opposite sides of the crown.
STEP 10:
Glue some leaves next to each of the large flowers, facing all different directions to cover up the white space of the base.
STEP 11:
Add the smaller flowers in between, gluing at different angles to add variety and fill in the space. Add more leaves as needed.

Remove any glue strings and these crowns are ready to wear! After the hard work I put into this, I can’t imagine I’ll ever get rid of it! Have fun making and wearing these crowns for any spring and summer occasion! xx


Creative Ideeas
Beautiful Post
Kind Regards
Mihai Medves
This is such a great idea for a flower crown, especially for flower girls. And the colors are perfect for a spring event. Thanks for sharing.
Thank you for sharing Such Wonderful Images,