Home DIY: Painted Pumpkins!!
Countdown to Halloween: 2 days. Excitement level: 9/10.
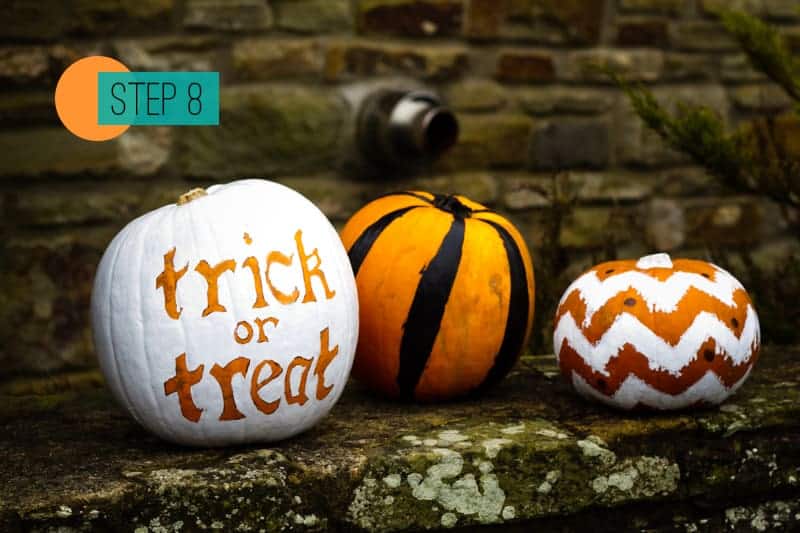
You know considering I’m pretty much the biggest wimp on the planet & my own shadow has been known to scare me in the past it’s quite shocking to know that I actually LOVE Halloween!! Maybe it’s the excitement of dressing up, maybe it’s the fun of trick or treaters knocking at the door or maybe…just maybe…it’s the joy of creating your own decorations and styling up the place to create a ghoulish and spoooooookey atmosphere! One of the best ways to upgrade your porch/doorstep/wall is of course with pumpkins! I know the traditional thing to do here would be to carve those little babies into whatever design you see fit but for a change this year I thought I’d give painting them a go and I have to admit, I love them!! The best thing about this idea is that you can make it as easy or as difficult as you like! Here’s how I made these three….
You will need:
♥ Pumpkins (obvs) ♥ paint (the black paint i used was craft paint & the white was just your standard wall paint out of the shed!) ♥ A paint brush (or two) ♥ Masking Tape
Step 1: Apply your masking tape in the pattern you want! For the black stripey pumpkin obviously apply the masking tape in strips and for the chevron style pumpkin you’ll want to apply the masking tape as shown above right!
Step 2: Get that paint on there and be careful not to let it leak under the masking tape (too much)
Step 3: Don’t forget to paint the stem of the pumpkin too!
Step 4: For the trick or treat pumpkin you can either draw it free hand with a biro (I just copied it from a font I liked) or you can print off some letters and carefully stick them on the pumpkin!
Step 5: Time to get painting again! You’ll want a thinner brush for in between the letters this time!
Step 6: Continue until the rest of the pumpkin is covered!
Step 7: Once the paint is completely dry pull the masking tape off the other two pumpkins.
Step 8: Display those gorgeous pumpkins outside for all to see!
Why I Love DIY Painted Pumpkins
Painted pumpkins are like the unsung heroes of autumn decor, aren’t they? They’re those little canvases that turn something as ordinary as a pumpkin into an artistic statement. I remember the first time I tried painting pumpkins for a wedding—thinking it would be a cute, rustic touch. Little did I know, these things are versatile enough to go from country chic to high-end glam, depending on your approach. It’s like they’re the chameleons of the seasonal decor world.
Now, let me tell you where they really shine—on the wedding tables. Placing a painted pumpkin as a centrepiece? Instant elegance. Picture this: metallic gold pumpkins, nestled among eucalyptus leaves and candles. The whole setup screams autumn but in a way that’s less “hayride” and more “black-tie barn.” And if you’ve ever tried metallic paints, you’ll know they give this sheen that catches the light just right. It’s one of those moments where you think, “This looks way fancier than it cost.”
Front porch? Perfect spot too. I love stacking them—think big at the bottom, smaller ones on top, and maybe a cheeky little pumpkin painted with polka dots for that whimsical touch. It’s like the pumpkins are greeting your guests with a cheeky grin. Trust me, a few well-placed painted pumpkins can take a porch from drab to Pinterest-worthy faster than you can say “autumn leaves.”
And here’s a fun idea: personalise them! Whether it’s a guest’s name for a seating plan or a quirky message like, “Fall in Love,” painted pumpkins let you add that extra layer of personality. They’re not just decor—they’re storytelling.
In the end, painted pumpkins have this playful yet refined vibe, and honestly, there’s no wrong way to use them. Just grab some paint, let your creativity flow, and have fun with it. And if the paint smudges? Well, that’s just character, darling!
Happy haunting & Halloweening!
Much Bespoke Love


