Bridal Manicure For Your Wedding Day: Can You Create the Perfect Look at Home?
Brides know their ring close-up photo will spread countless times on social media. Perfect wedding nails become a crucial part of wedding preparation. Professional salon services remain popular, but I found that there was a growing trend among modern brides to create stunning bridal nails at home.
DIY wedding nails appeal to many brides because they save money and provide complete control over the final look. Becoming skilled at our own wedding manicure means we can keep that perfect finish until the ceremony. As part of our bridal beauty hacks, this piece will help you create picture-perfect bridal nails without visiting a salon. You’ll learn professional techniques and get insider tips along with a list of must-have tools.
Planning Your DIY Bridal Manicure Timeline
A perfect DIY bridal manicure needs thoughtful planning and preparation. Here’s a complete timeline that will help you get those perfect wedding nails without last-minute stress.
When to start nail care preparation
Your nail care routine should begin 3 months before the wedding. Nightly application of cuticle oil and regular nail trimming promotes healthy growth during this period. This timeframe allows you to strengthen weak nails and fix existing problems. Your hands need protection with gloves during household chores, and a consistent moisturizing routine makes a significant difference. For more about nail care routines read this Allure Nail Care Tips.
Watch this video to learn more:
Practice sessions scheduling
The first practice session works best 2-3 months before the wedding. This timeline lets you try different colors and master your application technique. These trials help test various shades under different lighting to ensure they photograph well. You should track what works best – from drying times to color combinations and application challenges.
It’s also crucial to practice your bridal manicure skills well in advance. Experimenting early ensures you avoid accidental cuts or nicks on your special day, giving your hands a polished and professional look. Note that quality tools will give a perfect wedding manicure look we want to achieve. Experience shows that cheaper tools create disappointing results, especially in those picture-perfect bridal nails for wedding photos. Using professional manicure sets can make a world of difference, providing the precision and quality tools necessary for flawless results. Prioritizing proper tools and techniques now will save you from stress later and ensure your nails are picture-perfect for your wedding.
Final wedding week timeline
Your bridal wedding nails need this recommended schedule:
- 5 days before: Practice one last time with your chosen color
- 3 days before: Give hands a deep moisturizing treatment
- 2 days before: Start final wedding manicure preparation
- 1-2 days before: Create your DIY bridal manicure
- Wedding day: Keep touch-up supplies within reach
The final application deserves your complete attention. Note that rushing through the process leads to mistakes, so set aside two hours of uninterrupted time to create your perfect wedding manicure.
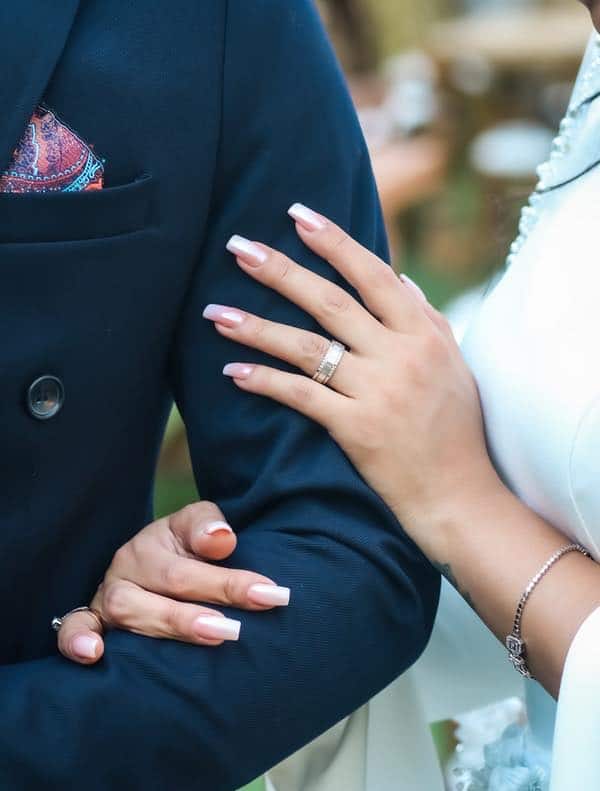
Photo by sina rezakhani on Unsplash.com
Essential Tools and Products Investment
Perfect bride wedding nails need the right tools to create at home. The original cost might look high, but it saves money by a lot as time goes on.
Professional-grade tools checklist
Everything in salon-quality results needs these items:
- Professional nail clippers and glass nail file. For more about this check out Elle Manicure Tools.
- Cuticle serum and pusher tool
- Base coat, top coat, and chosen polish
- Buffer cube and clean-up brush
- Quality hand lotion and cuticle oil
Cost comparison with salon services
A complete bridal manicure set costs about $50. This price tag might look high, but a single professional wedding manicure ranges from $20-32. Regular salon visits add up quickly between trials and the final look, totaling over $100 in expenses. The DIY kit pays for itself after a few uses. For more about cost-effective beauty hacks read Forbes Beauty Hacks.
Must-have emergency supplies
The wedding day needs these items close by to keep your mind at ease:
- Clear nail polish for quick fixes
- Cuticle nippers for any snags
- Your chosen polish color for touch-ups
- Top coat for last-minute shine
- Nail file for emergency smoothing
Mastering Basic Techniques
Creating perfect bride wedding nails requires proper technique. Let’s take a closer look at the skills you need to achieve that perfect wedding day look.
Nail shape and length for your ring
The right nail shape makes a huge difference in your engagement ring’s photos. These classic options will give you the most flattering look:
- Medium-length soft almond shape – creates an elegant, elongated appearance
- Short round or squoval shape – perfect for a classic, timeless look
- Natural length with slightly rounded edges – ideal for ring-featuring poses
Watch this video to get some more useful tips:
Polish application secrets
A flawless wedding manicure needs these proven steps:
- Clean nails with polish remover
- Apply base coat and wait 2-3 minutes
- Use three strokes per nail – sides first, then center
- Wait 5-10 minutes between color coats
- Cap the free edge to prevent chipping
- Finish with quality top coat
For more about nail polish application read Marie Claire Nail Tips.
Cuticle care fundamentals
Healthy cuticles play a vital role in perfect bridal nails for wedding photos. The best approach is to gently push cuticles after applying oil instead of cutting them. Daily application of cuticle oil or vitamin E will keep your nail area moisturized and healthy. Your hands will look stunning in those close-up ring shots, and your nails will grow stronger.
Wedding-Day Photography Considerations
Photography is a vital part of capturing our bridal wedding nails, and experience shows that specific techniques can make all the difference in getting that perfect shot.
Best colors for photography
The right nail color choice depends on skin tone and lighting conditions. Light pinks that complement natural undertones work best for fair skin. For more about the best nail colors for different skin tones read Refinery29 Nail Colors. Warmer beiges and nudes create beautiful photographs on darker skin tones. These photography-friendly choices stand out:
- Sheer pink to achieve a classic, timeless look
- Milky white that brings sophisticated simplicity
- Subtle shimmer polish that catches light
- Warm beige that enhances deeper skin tones
Watch this video for some bridal nail inspiration:
Ring-featuring poses
Hand positioning makes all the difference in showcasing our bridal manicure. The core team focuses on creating length and elegance in fingers. The most flattering ring shots come from positioning hands at a slight angle. Fingers should stay softly curved rather than straight. This approach elongates the fingers and lets the ring catch light perfectly.
Lighting and angle tips
Experience with bridal nails for wedding photography shows that lighting can enhance or diminish nail photos. Natural daylight provides the best results, especially near a window that offers soft, diffused light. Artificial light works best from a 45-degree angle. This minimizes shadows and prevents washing out nail color. Ring shots need light from slightly above to capture sparkle without harsh shadows. For a short guide on taking great nail photos read PopSugar Nail Photography
Conclusion
You can create perfect bridal nails at home with dedication, practice, and attention to detail. My experience shows it’s achievable. The path to professional-looking results starts with careful planning months before the wedding day. Regular practice sessions help you master essential techniques.
High-quality tools make the most important difference in achieving that picture-perfect finish we want for our wedding photos. My trip taught me that time spent learning proper application techniques makes a huge impact. Understanding photography’s nuances helps capture those precious ring shots.
Perfect bridal nails go beyond the final look – they boost your confidence on your special day. The right knowledge, tools, and timeline will help you create stunning bridal nails. Your nails will look beautiful in person and photographs, which makes those ring close-ups truly unforgettable.


