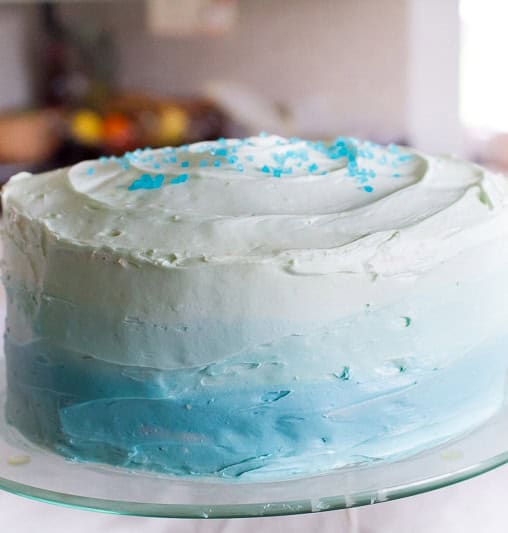
How To Ice An Ombre Cake
Now I’m no professional at making cakes and although we attended a Cake Decorating Class with GC Couture not long ago I still feel pretty mediocre in this department. Needless to say though I’ve been seeing so many ombre iced cakes around the internet and I thought it was about time I had a crack at it!
And let me tell you, it wasn’t as difficult as I thought it was going to be! If I can do this, then I know you can too…
// For this cake I used 2 Betty Crocker vanilla cake mixes (to make 4 sponges) // 3 Tubs of Betty Crocker buttercream frosting (at 450g each) // Blue food colouring // Spatula // Decorating sprinkles //
Step 1: Bake your sponges as instructed on the pack, then leave to cool and carefully slice the tops off so you have a flat surface. Then smother the top with frosting.
Step 2: Place your 2nd sponge on top (with the top cut off) and cover the top of it in icing again. Continue to do this until all of your sponges are layered on top of each other. Leave the top layer bare with no icing for now.
Step 3: Thin out some icing with a couple of drops of water and smother over the entire cake to create a smooth surface all over, then place in the fridge for 30 minutes.
Step 4: Separate your remaining icing into 3 separate bowls and get your food colouring ready! For the lightest colour I dipped a toothpick into the food colouring and let 1 single drop into the icing, then for the medium tone I used a few small drops and for the darkest over it was around 2 large full drops of food colouring, but feel free to mess around adding drops in until you’re happy with the colours! Next take your darkest shade and use your spatula to smother it over the bottom part of the cake.
Step 5: Do the same with your medium shade of icing a little higher up the cake, don’t worry if it’s messy at this stage, we’ll clean it up after!
Step 6: Finally repeat with your lightest shade and smother it over the top of the cake too!
Step 7: Clean off your spatula and angle it slightly against the cake, you’ll want to gentle run it around the cake so it scoops off any excess icing and leaves a smooth finish. Keep working your way up and then continue scooping in a circular motion on the top of the cake.
Step 8: Make sure you have a cup or bowl handy to wipe off your excess icing on the edges!
Step 9: Sprinkle the top of your cake with any decorations you like and enjoy!
Pretty simple right? Once you get used to the smothering technique of the icing it’s all plain sailing! Plus it’s such a pretty cake! Now if you’ll excuse me, there’s a piece with my name on it waiting for me with a cup of tea…
Much Bespoke Love
Jess


