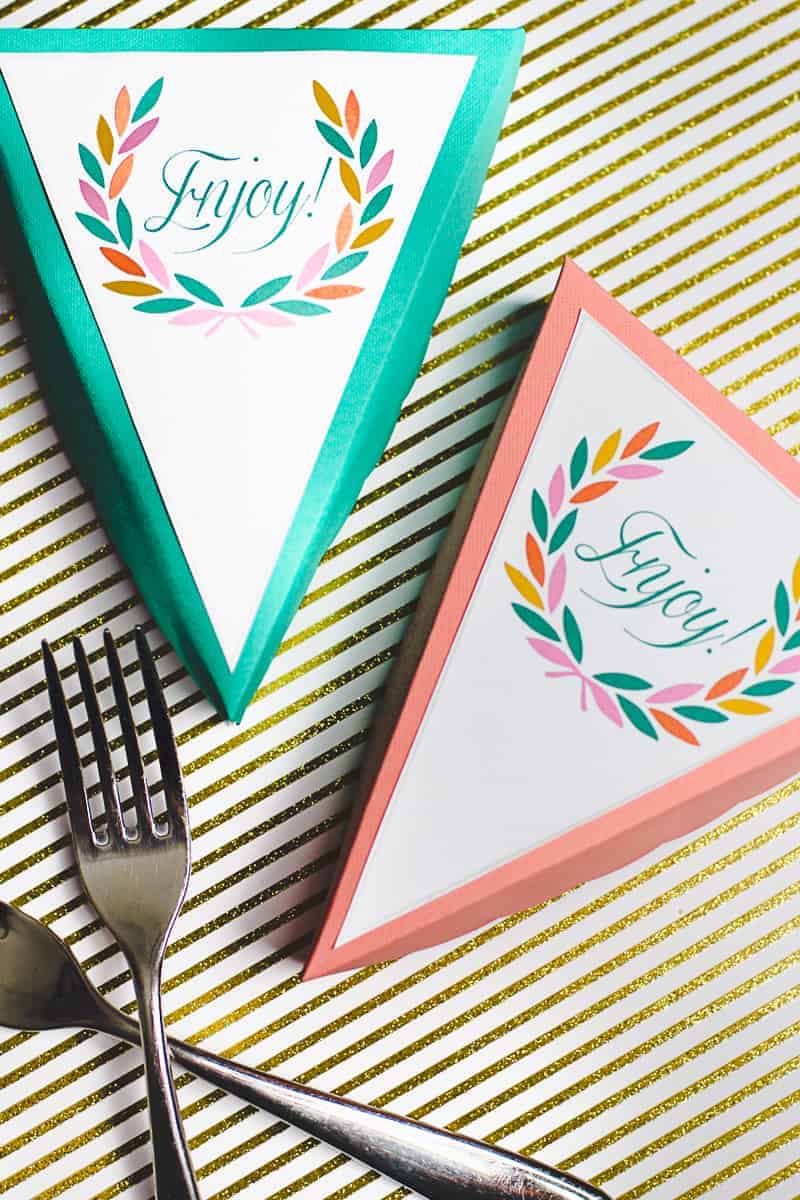
DIY Pie Box with Free Printable Label
If you follow us on Instagram or Facebook you may have noticed that we invited a couple of our best blogging babes to BB HQ last weekend to enjoy a very American holiday – Thanksgiving! It was a little indulgent to say the least! There was turkey (not for me, I’m veggie) mashed potatoes, green beans, carrots, swede and so much more. Then for dessert Jess made a delicious apple and blackberry pie and I accompanied it with a rather boozy hot chocolate.
As you can imagine with all that food, there were a lot of leftovers, so to make sure nothing was wasted and as a special little thanksgiving treat for the girls to go home with, we created these cute and colourful pie boxes! Not only are these perfect for takeaway leftovers, we also thought these would make fab favors too!
You Will Need: Printable labels (Click here to download) // Pie Box Template// Glue// White Paper// Cricut Cardstock// Cricut Explore//
Step 1: Head on over to the Cricut Design Space , create a new project and search for ‘Pie box’.
Step 2: Following the instructions on the screen continue to cut out the pie box with the Cricut.
Step 3: Now you are ready to assemble the box using glue to adhere the edges together.
Step 4: Next, glue your printable label on top and voila you are ready to enjoy your pie on the go!
Stay tuned tomorrow guys to hear all about how we celebrated our first very merry thanksgiving and be sure to hop on over to Youtube to check out our take on a ‘Modern Thanksgiving Table‘! We would love to hear your thoughts!
Happy Holidays!
xxx
More Tips for Making a DIY Pie Box
Making a DIY Pie Box at home can be a fun, practical project that adds a personal touch to your baked goods. Whether you’re gifting a homemade pie or simply need a cute way to store your creations, a DIY Pie Box is the perfect solution. With a bit of creativity and a few supplies, you can easily craft one that’s both functional and beautiful.
Step 1: Choose Your Materials
Start by selecting sturdy materials like cardboard or craft paper. A good DIY Pie Box needs to hold up under the weight of your pie without collapsing, so make sure the material is durable. You can use recycled cardboard from a previous package, which is a bonus for anyone who likes eco-friendly projects. You’ll also need tape or glue, scissors, and a ruler for precise cutting.
Step 2: Measure and Cut
To ensure your pie fits snugly in the box, measure the dimensions of your pie tin. You’ll want the DIY Pie Box to be just slightly larger than the pie itself, allowing some room for decorations but still keeping it secure. Carefully cut out the sides, top, and bottom of your box, and don’t forget to add about 1-2 cm for folding edges, which will help when assembling the box.
Step 3: Personalise Your Box
Here’s where the magic happens! Personalising your DIY Pie Box makes it special. Use decorative paper, stamps, or even hand-drawn designs to make it unique. You can also tie a ribbon or add a cute tag to complete the look. If you’re gifting the pie, adding a handwritten note or sticker with the pie’s flavour can be a charming final touch.
Step 4: Assembly
Once your materials are ready, fold along the edges and secure them with tape or glue. Ensure the pie box is sturdy, especially around the corners. This is key for making sure it doesn’t give way while transporting your delicious pie.
With these simple steps, you’ll have a beautiful DIY Pie Box that adds a handcrafted charm to your next pie presentation. It’s a practical and creative way to give your pies the packaging they deserve!
**This post has been made possible thanks to Cricut™. **


