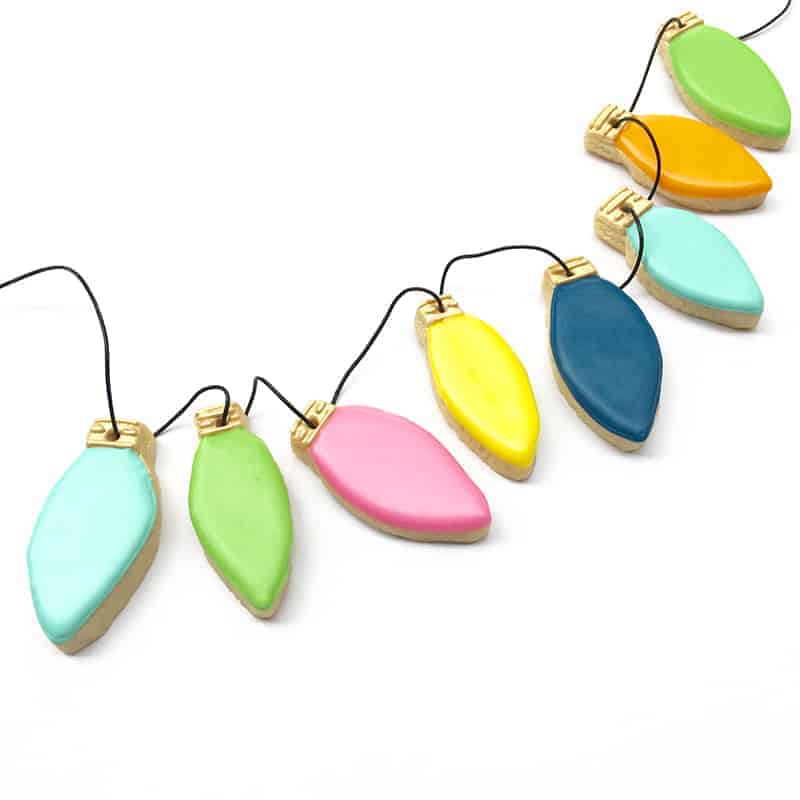
DIY CHRISTMAS LIGHT COOKIES (AKA THE BEST XMAS COOKIES EVER)
Oh em gee you guys, Christmas is creeping upon us and I’m so excited to start baking up some festive treats! Last week me and James made our first attempt at baking and decorating ginger bread men and let’s just say…I’m glad Deanna from Obsessive Cookie Designer is here today sharing her cookie tutorial and not me! These Christmas light cookies are absolutely adorable and would make super cute gifts or even festive favours!
YOU WILL NEED:
6 cups flour // 3 tsp. baking powder // 2 cups butter // 2 cups sugar // 2 eggs // 2 tsp. vanilla extract // 1 tsp. salt // 3 3/4 cups sifted confectioners(powdered) sugar // 3 T meringue powder(I buy at Michael’s) // 6 T warm water // Food colouring of your choice // A piping bag or bottle // Christmas light bulb cutter (we recommend Cookie Cutter) or a sharp knife if cutting by hand // Small craft wire (the one shown is from Michael’s, found in the jewelry section). Black licorice would work well as an edible version also. //
STEP 1:
Cream the butter and the sugar then add the eggs and the vanilla. Next, mix the dry ingredients and add to the butter mixture. Mix well then chill the dough in the fridge before rolling out.
STEP 2:
Cut into light bulb shapes (light bulb cutter available on Amazon or you can cut them by hand with a knife like I did!). Create a small hole at the bottom of the bulb with a toothpick, spinning the toothpick to ensure the hole is large enough to pass a small wire through it.
STEP 3:
Bake on ungreased cookie sheet at 350 degrees for 8-10 minutes or just until beginning to turn brown around the edges. (Top tip: If you are having a problem with your cookies holding their shape, it helps a lot if you put them in the freezer on the baking sheet for about 15 minutes before you bake them.) Then leave to cool.
STEP 4:
Beat your powdered sugar, meringue powder & warm water for 4-5 minutes, until smooth then separate into how many colours you would like and add your colouring gradually until you’re happy with the shade.
STEP 5:
From a piping bag or bottle, start by piping the gold bottom of each light bulb and allow this to dry. After the gold dries, pipe the colored bulbs then allow to dry completely (24 hours).
STEP 6:
Finally, pass your wire through the holes to connect the lights!
These would also look adorable hanging on your Christmas tree am I right?! I can’t wait to have a go at these myself, and if you do the same be sure to share it with us by tagging #bespokebridediy on Instagram and Twitter! We would love to see your creations! xx
Original cookie recipe here // Photos by Obsessive Cookie Designer //


