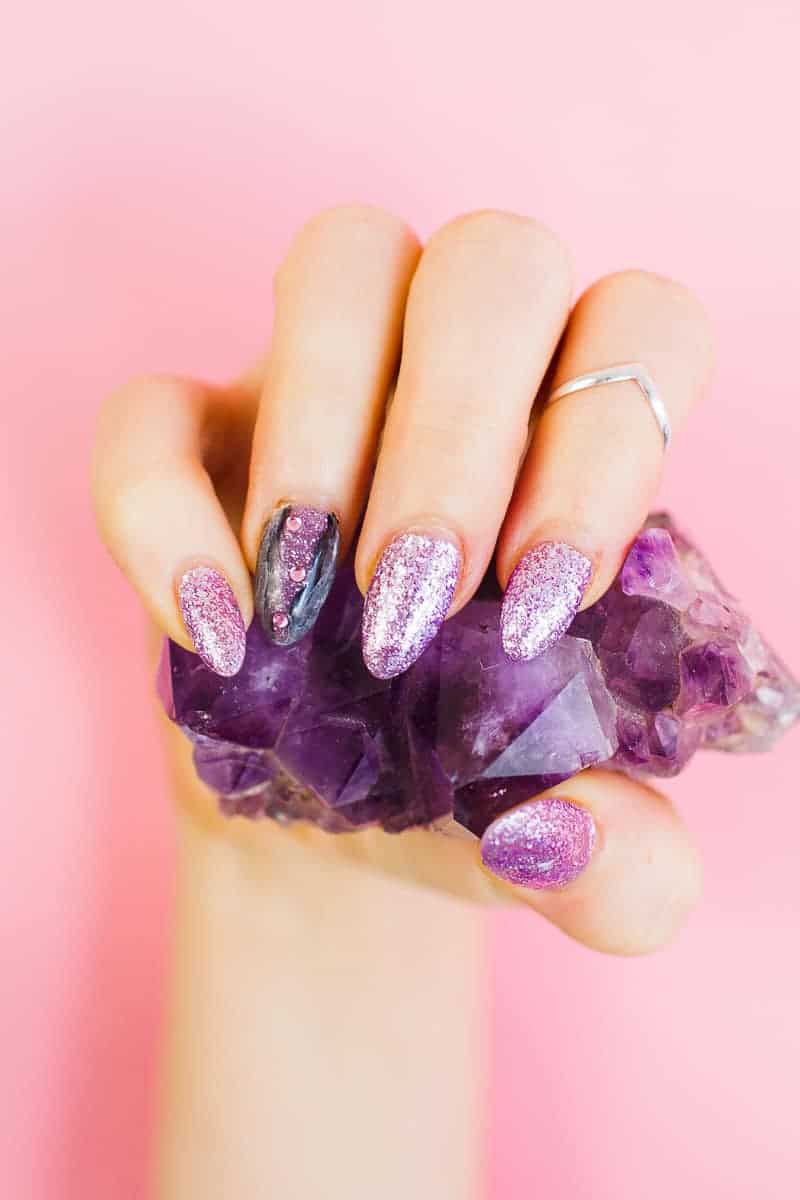
DIY GEODE AMETHYST NAIL MANI

*NEW TREND ALERT* Geode is going to be BIG in the wedding industry this year and we are loving this trend! I mean how beautiful are the amethyst rocks? Every single stone is different and unique in it’s own way! We have a few DIYs planned over the upcoming months including geode but we thought it would be fun to kick off the trend with an amethyst nail mani! I just love how glittery and sparkly this design turned out, they are definitely sure to WOW! Here’s how to recreate this look…
YOU WILL NEED:
Grey acrylic powder and acrylic liquid (can also achieve this by mixing black pigment with clear acrylic powder in a pestle and mortar) in a light grey and dark grey // Clear acrylic powder mixed with purple magpie glitter // UV top coat to finish // Buffer // Black acrylic paint // White acrylic paint // Lecente nail art brush // Gems // Gel glitter polish //
STEP 1:
We started off by painting a purple gel glitter polish on all of the nails except for the ring fingers, we put two coats of gel on too.
STEP 2:
Next, take your grey acrylic powder, dip it on your acrylic liquid and start to apply it on the outsides of the nail of the ring finger. You’ll want to create a slight wave through the centre ready to fill in the purple at a later stage.
STEP 3:
Now go around the outside of that grey acrylic powder with a darker acrylic grey to create a slight ombre effect on the nail.
STEP 4:
Next, fill in the space between the dark grey acrylic with your clear glitter acrylic powder and then buffer the entire nail down so that the whole surface is the same level.
STEP 5:
For this next step you’ll need to grab a bowl of water, your black acrylic paint and your nail art brush. Dip your paintbrush into your paint and follow the line where your grey acrylic touches the purple, then quickly dip your brush back into the water and blur out the line so that it’s not super defined.
STEP 6:
Repeat the previous step using the white acrylic paint varying the placement and adding the water to blur it out and help it all merge in together.
STEP 7:
Next add on a few small nail gems then add your UV top coat to finish and set. Job done!
What do you guys think? I love how glittery it is! Do you have any other nail tutorial ideas that you would love to see here? Leave us a comment and let us know! We always love hearing your ideas xx


The final outcome is elegantly stunning. This manicure/ nail art design is perfect for prom, wedding, and other special occasions. I think for beginners it will take some time to get it as great as you did but practice makes it perfect.